
VEBA AV70mm reversing camera
The Auto-Sleeper Motorhome Owners Forum (ASOF) :: Auto-Sleeper Motorhome Forums :: Auto-Sleeper "Coachbuilt Motorhomes" Forum
Page 1 of 2 • 1, 2 ![]()

 VEBA AV70mm reversing camera
![]() by Orkneyboy Thu Apr 29, 2021 9:41 am
by Orkneyboy Thu Apr 29, 2021 9:41 am

Orkneyboy- New Member

-

Posts : 4
Joined : 2020-10-05
Location : Carlisle
Auto-Sleeper : Peugeot Broadway EKT
Vehicle Year : 2010
Re: VEBA AV70mm reversing camera
![]() by gassygassy Thu Apr 29, 2021 9:51 am
by gassygassy Thu Apr 29, 2021 9:51 am
_________________
complexity is the enemy of reliability
gassygassy- Donator

-
Posts : 1111
Joined : 2019-06-21
Location : Lutterworth
Auto-Sleeper : 1 Bourton 1 Polensa
Vehicle Year : various
Re: VEBA AV70mm reversing camera
![]() by Orkneyboy Thu Apr 29, 2021 10:18 am
by Orkneyboy Thu Apr 29, 2021 10:18 am
Orkneyboy- New Member
-
Posts : 4
Joined : 2020-10-05
Location : Carlisle
Auto-Sleeper : Peugeot Broadway EKT
Vehicle Year : 2010
Re: VEBA AV70mm reversing camera
![]() by PLOUGHLIN Thu Apr 29, 2021 10:24 am
by PLOUGHLIN Thu Apr 29, 2021 10:24 am
[You must be registered and logged in to see this link.]
_________________
Peter L

PLOUGHLIN- Donator
-
Posts : 4724
Joined : 2014-06-24
Member Age : 54
Location : NORTH HERTS
Auto-Sleeper : MB Gloucester
Vehicle Year : 2011
Orkneyboy- New Member
-
Posts : 4
Joined : 2020-10-05
Location : Carlisle
Auto-Sleeper : Peugeot Broadway EKT
Vehicle Year : 2010
VEBA AV7water ingress into the camera housing
![]() by miket Wed May 19, 2021 4:30 pm
by miket Wed May 19, 2021 4:30 pm
miket- Member

-
Posts : 6
Joined : 2021-05-11
Location : Petersfield
Auto-Sleeper : Nuevo Es
Vehicle Year : 2015
Re: VEBA AV70mm reversing camera
![]() by GrahamF Wed May 19, 2021 10:18 pm
by GrahamF Wed May 19, 2021 10:18 pm
Yes I don’t think you are alone in having moisture ingress problems on the Veba camera. Five or six years seems to about average.
My Worcester is coming up to 10 years old and the Veba has been slowly becoming more and more misty.
Therefore I decided that due to more inactivity this year I would finally bite the bullet and get around to changing it.
I am fairly well into the job as of now and intended to write up my trials and tribulations (of which there have been many) in the near future for the benefit of other folk attempting the same.
Regards Graham
GrahamF- Donator
-
Posts : 157
Joined : 2013-11-03
Member Age : 80
Location : Yorkshire Dales
Auto-Sleeper : Worcester
Vehicle Year : 2012
miket likes this post
Re: VEBA AV70mm reversing camera
![]() by gassygassy Thu May 20, 2021 10:33 am
by gassygassy Thu May 20, 2021 10:33 am
I found the single camera fitted to the Nuevo wasn't much good, certainly not in quality nor in quantity. You need two cameras, one to see the following traffic and another pointing down at the bollard you are about to collide with. I wrote an article on how to do this and it was published in MMM. In fact I thought I had written it up on this forum somewhere.
You need the whole kit, I got mine from [You must be registered and logged in to see this link.] I have had about half a dozen kits from them. Dave there is extremely knowledgeable and helpful. There are a few tricky moments for which you have to summon all your confidence. One is to drill a big hole immediately in front of the standard fitted camera in order to undo the nut that holds it in, and the other is to feed a new cable from there across the top of the kitchen cabinets in the void between the outer fibreglass skin and the inner rear cabinetry. You need a new cable (DRW supplies this in the right length for your van) because you can't get two camera signals down the one-signal cable that is fitted as standard. Then you have to get the cable down to chassis level and from there it is easy peasy. I wouldn't run the cable above the side entrance door and through the cupboards, that route poses a lot of difficulties. Here are some photos which might help:
The first is the dimensions of where to drill the hole to access the rear of the original camera. You will need a hole at least 2 1/2 inches dia in order to get most of your hand into, and in order to undo the nut and feed a cable across inside the void. Then you need some stiff-but-not-rigid wire as a draw string to attach the new cable to. I found the best solution to hand was to use satellite TV aerial cable, it is just rigid enough to be able to push through a void and yet bendable enough to make a hook to attach the new camera cable to.
The process is this:
Measure where to drill the hole and cut a 2 1/2" - 3" hole in the top cupboard.
Cut the original cable where it enters the nut, and undo the nut. Remove the old camera.
Take the satellite cable and form a U bend in it. This will be needed to hook the electrical rod on to, to pull it down through the vertical void. Feed it through the hole horizontally across through the void towards the nearside, above the top of the Nuevo indented fibreglass back.
From underneath post an electrical rod set (cheap, eg from screwfix / plumbfix) and hook the satellite cable round the rod hook, and pull it down to below the floor level. There is another void running vertically from roof to floor at the corner. Removing the rear lights will probably help.
You now have the 'stiff-but-flexible' satellite cable running from the rear of the camera to under the floor, and that is the difficult bit over. Join the new dual camera cable to the satellite cable and pull it through.
Run the camera cable along under the chassis to the n/s door footwell, remove the plastic foot-tread and drill / grommet a hole for the new cable to pass through.
Run the cable up the door frame, undo the side windscreen plastic trim, put the cable inside it, and feed it under the front of the cab roof lining to the mirror position. Coil up the surplus cable and tuck it inside the roof lining.
Find 12v-when-the-ignition-is-on from the general wiring you will find above the interior light and feed this to the new rear view monitor.
Back at the camera end drill a slightly bigger hole than the existing one for the camera cable, mount the dual cameras and the rest is easy so I don't need to elaborate.
To fill the big hole in front of the camera inside the roof cupboard I took the circular disk I cut out, and pushed it back holding it in place with silicone. I then got a 4 inch square ceramic tile which matched the wallpaper inside the cupboard and stuck it on to hide the circular access point. Once you have crockery etc in the cupboard you will never notice it.
I have a lot more photos but this web site will only allow me to post three so I hope I have chosen the most useful ones.
[You must be registered and logged in to see this link.]
gassygassy- Donator
-
Posts : 1111
Joined : 2019-06-21
Location : Lutterworth
Auto-Sleeper : 1 Bourton 1 Polensa
Vehicle Year : various
Re: VEBA AV70mm reversing camera
![]() by Gromit Thu May 20, 2021 11:10 am
by Gromit Thu May 20, 2021 11:10 am
Our camera has never been much good, but until it packs in completely I'll probably live with it.
Have saved your instructions for later, in case I need them.
Cheers

Gromit- Donator
-
Posts : 7265
Joined : 2015-03-11
Member Age : 80
Location : Worcestershire
Auto-Sleeper : Nuevo EK LP
Vehicle Year : 2015
Re: VEBA AV70mm reversing camera
![]() by gassygassy Thu May 20, 2021 5:05 pm
by gassygassy Thu May 20, 2021 5:05 pm
_________________
complexity is the enemy of reliability
gassygassy- Donator
-
Posts : 1111
Joined : 2019-06-21
Location : Lutterworth
Auto-Sleeper : 1 Bourton 1 Polensa
Vehicle Year : various
Re: VEBA AV70mm reversing camera
![]() by Sparks Tue May 25, 2021 6:56 pm
by Sparks Tue May 25, 2021 6:56 pm
Sparks- Member
-
Posts : 36
Joined : 2018-05-28
Location : Bournemouth
Auto-Sleeper : Bourton
Vehicle Year : 2014
Re: VEBA AV70mm reversing camera
![]() by BornAgain Tue May 25, 2021 8:11 pm
by BornAgain Tue May 25, 2021 8:11 pm
BornAgain- Member
-
Posts : 325
Joined : 2016-03-27
Member Age : 77
Location : Bourne End, Bucks
Auto-Sleeper : Bourton
Vehicle Year : 2022
Re: VEBA AV70mm reversing camera
![]() by gassygassy Tue May 25, 2021 8:57 pm
by gassygassy Tue May 25, 2021 8:57 pm
You were lucky, Sparks. I couldn't do that with mine, it was only 3 core. I suppose in theory you might be able to find a local +12v to feed the camera but then it would be on all the time. And it might be in for example the cooker extractor fan so you would still have to cut the big hole and rummage around to run a wire. It could be easier though. I think if you did that you would find at least the LEDs would be lit when the engine is off and the habitation 12v is turned on. I did give it serious consideration, I assure you!Sparks wrote:If you check the existing wiring you may find as I did that it is 4 core cable, if it is you will find a spare core which can be used for a second camera. The existing camera requires 3 cores, live, neutral and a signal wire. I was lucky and found I had access to the rear of the camera, but if you do have to cut a 3" (75mm) hole as Gassy suggests then you can obtain an overlapping cover plate from any electrical wholesaler which is 85mm in diameter for approx £1.
gassygassy- Donator
-
Posts : 1111
Joined : 2019-06-21
Location : Lutterworth
Auto-Sleeper : 1 Bourton 1 Polensa
Vehicle Year : various
More Veba Camera
![]() by GrahamF Wed May 26, 2021 5:52 pm
by GrahamF Wed May 26, 2021 5:52 pm
First of all my compliments to all those that have written up their previous experience - it was only this that gave me the confidence/knowledge to attack the task.
As stated in an earlier post, my Worcester is now in its 10th year and the Veba camera has been getting slowly more misted up, almost certainly due to water ingress.
Although other members have replaced with the popular dual cameras giving rear view as well as "downward" view, personally I wanted to stick to just the "downward" variety. Motorhomes are never going to be the fastest vehicles on the road and although I always try to help other drivers to come past safely, there is nothing more annoying than being tailgated. The great advantage of the door mirrors is that although you know that a vehicle is present, it doesn't bother you in the slightest! Anyway each to their own.
I took previous advice and purchased a Sony CCD camera from DRW Electronics.
The Worcester is an end bathroom layout. Removing the mirror board with the dreaded blue leds was straightforward - two covered over screws at the top and amazingly eight screws under the two cupholders. (The AS fitter had even had two goes at some of the screws so that it was positively riddled - all hidden under the cupholders).
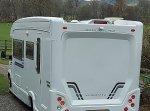
You are then left with a 2" dia hole as hopefully is shown in the photo.
[You must be registered and logged in to see this link.]
There is very little to reference external to internal positions on this layout, so after a myriad of measurements I decided on the position to drill. I had obtained a 6" cutter on the grounds that the mirror board would cover it and the bigger the better for working room. (This proved to be true as most of the wiring had no slack in at all). I had determined that there was wiring behind this spot but there was no alternative but to be careful! The inner wall is 30mm thick, about 2 to 3mm of surfaced plywood and the rest being some form of polystyrene foam with a membrane backing. Well, I was not quite careful enough at the end and just nicked a couple of these wires. As luck had it they were both to do with the "dreaded blue leds" and I had half intended completing some mods on them anyway.
[You must be registered and logged in to see this link.]
The picture shows the back of the Veba camera with the sealant removed. Undoing the nut was quite easy (with a 6" hole!) and gave me access to the rear.
In fairness to Veba, their camera is physically well thought out with just that one easy to seal 6mm dia mount point. They even have a phenomenally small 4 way connector (power plus video). Pity the camera itself is not up to much.
Mounting the Sony camera required enlarging the entry hole to 13mm and adding two further 4mm holes for fixing. I did have this idea that I would use 4mm stainless woodscrews and stick a piece of tapped oak on the inside such that if I ever needed to remove it in future then it could be all done from the outside. Well it was a good thought but after things were sealed up with external silicone both inside and out, I am not at all sure removing it this way would be possible. At least the oak gave it good strength. It is possibly one of the weak points of the Sony camera in the size and number of entry holes required - lots of sealant necessary.
As reported by others, the Veba camera feed incorporates a moulded in line regulator situated near to the camera. Being moulded it was impossible to see the actual connections, so it was cut off and found to consist of an obvious 12V and 0V lead together with a screened twin. Don't be fooled into thinking (as I did) that this was a balanced video input. The yellow wire was the actual video in (wrt the screen). The pink wire was a 12V source - for what use I know not, but it needs insulating at least. Interesting that Sparky found he could possibly use it as a second video feed - I don't see why not if you can re-route it at the monitor end.
As regards modifying the mirror lights, I purchased a couple of Aten 50cm slim LED fittings (£19.58 incl postage). If you remove the clips and stick them to the board then they are nicely flush with the mirror. Quite pleased with those. I bought the brighter option, and it is quite bright. In retrospect maybe the lower output versions would have been enough - still there is no excuse to cut myself shaving now! They were obviously wired up in place of the dreaded blues.
I wrapped the disc cut out from the wall with many turns of masking tape until it was a good push fit. A stick of wood was put on the back and a thinnish nylon cord brought through to the inside of the wall so that it could be pulled out if necessary.
I was very surprised that all of the fixings of the mirror board (which is solid 12mm plywood) were made purely into the (mainly polystyrene) inner wall. (Not even deep threaded screws Gromit). There is a large 40mm thick plywood crossmember going horizontally across the van just a couple of inches below their chosen upper fixing position. It would really have seemed to be the obvious choice to screw into, but no, it was disregarded. A careful note was made as to where this was in case I ran into problems later in re-fixing the mirror board.
Remounting the board was ten times more difficult than removing it - especially doing it single handed in the confines of the bathroom. Lots of clamps and wood props had to be contrived to hold it in position while the wiring was threaded back through the entry holes and the screws hopefully lined up in their original position. Surprisingly it all went back OK and seems very solid.
[You must be registered and logged in to see this link.]
If there is anyone still living that is still reading this then I hope you found it of some use.
Was it an easy job? Well it might be if I ever had to do it a second time! I am sure younger and abler people would waltz through it. The years make the physical side a tad more difficult. Still it is done and I am pleased with it.
What's the betting that I hit that post at the back on our next trip out...……
Regards Graham
GrahamF- Donator
-
Posts : 157
Joined : 2013-11-03
Member Age : 80
Location : Yorkshire Dales
Auto-Sleeper : Worcester
Vehicle Year : 2012
jwells, PLOUGHLIN, spanner, gassygassy, Bilbobaggins and FreelanderUK like this post
Re: VEBA AV70mm reversing camera
![]() by KiwiKruiser Tue Jan 11, 2022 10:49 pm
by KiwiKruiser Tue Jan 11, 2022 10:49 pm
KiwiKruiser- Member
-
Posts : 10
Joined : 2022-01-11
Location : Auckland
Auto-Sleeper : Sigma EL
Vehicle Year : 2008
Re: VEBA AV70mm reversing camera
![]() by Kemerton-bath Wed Jan 12, 2022 5:47 pm
by Kemerton-bath Wed Jan 12, 2022 5:47 pm
Tim
_________________
Previously symbol-bath
1996 - Autosleeper Symphony 2010 - Autosleeper Symbol 2018 - Autosleeper Kemerton 2023 - Autosleeper Kemerton XL (Fiat)
Kemerton-bath- Donator
-
Posts : 1103
Joined : 2013-01-06
Member Age : 64
Location : Bath
Auto-Sleeper : Kemerton XL (Fiat)
Vehicle Year : 2020
KiwiKruiser likes this post
Re: VEBA AV70mm reversing camera
![]() by KiwiKruiser Wed Jan 12, 2022 8:02 pm
by KiwiKruiser Wed Jan 12, 2022 8:02 pm
To recap, your description of the problem “ The failure mode was a blank screen, initially intermittent but then becoming more permanent over several weeks. I checked all connections and found them OK” matches mine. Now, it hardly ever works. But yesterday completely unexpectedly it did. But only for a short period!
What shows on the screen when the fault is occurring is: when in reverse (or turned on using the remote) is a screen flicker every 3 or so seconds, on both AV1 and AV2 even though AV2 (switched using the remote) has nothing connected. (Does this question the screen rather than the camera?)
When it “comes right” AV1 shows the image from the camera and AV2 shows a blue screen with “AV2” top left I recall (I cant verify exactly what shows unless it is working which isn't very often).
I have good access with spare cable length at the camera end. There, what I now believe to be the voltage regulator thanks to your photos, heats up (a property of a voltage regulator) which tells me there is voltage there when the system is “on” (ie in reverse etc). It gets quite hot and I initially suspected that. But dropping voltage 12v to 3.3v could do that. (If it is actually a 3.3v camera).
But from here, I am uncertain what to do because I have to cut or expose wires to test further. Point of no return. Suggestions on determining if it is the screen or camera that is at fault welcome. If only I had a spare working 3.3v camera with a male 3-way connector!
BTW The posting I made was a photo of the “Installation Instructions” that came with the vehicle when new, which in fact are of no use really. It does not even show the voltage regulator in the wiring diagram. As a newbie, I failed to upload it correctly.
KiwiKruiser- Member
-
Posts : 10
Joined : 2022-01-11
Location : Auckland
Auto-Sleeper : Sigma EL
Vehicle Year : 2008
Re: VEBA AV70mm reversing camera
![]() by GrahamF Wed Jan 12, 2022 11:11 pm
by GrahamF Wed Jan 12, 2022 11:11 pm
Intermittent faults can be the very devil to fault find - at least yours is at least more off than on.
When it was working, did your display only switch on when reverse was selected? (Some like mine come on with the ignition).
My initial feeling is that it could be a fault on the display as you are surmising, or possibly it is not receiving the 12v feed or ground? That could be worth chasing up though having never played with the display I can’t offer any advice on the connections at that end. Others may be able to assist. The blue screen on AV2 that you found when it was briefly working would seem to be correct and again would point to a fault or connection at the display end.
Good luck, sorry I can’t help you more.
Regards
Graham
GrahamF- Donator
-
Posts : 157
Joined : 2013-11-03
Member Age : 80
Location : Yorkshire Dales
Auto-Sleeper : Worcester
Vehicle Year : 2012
KiwiKruiser likes this post
Re: VEBA AV70mm reversing camera
![]() by KiwiKruiser Wed Jan 12, 2022 11:56 pm
by KiwiKruiser Wed Jan 12, 2022 11:56 pm
The monitor connection seems to be “always on” but asleep even when the ignition is off. Just like the TV at home, it can come “on” with the remote irrespective of the the ignition being on or off. But to come on with reverse, the ignition must be on.
Normally the display comes “on” when I put the gear lever into reverse with the ignition on and the motor may be running or not. OR it comes on with the remote which normally I rarely use. This has led to the display being “on” without me knowing (because with this fault the screen is not lit!) after pressing the remote on/off a few times - like over the last few days as I do diagnostics eg. This peculiarity in itself I can handle so long as I KNOW if the unit is ON. So power may well have been ON for long periods without me knowing. Which led me to trying to locate and fix this problem 🤪.
I just went out and tried it. Wouldn’t you know it, it is working fine. That is until I actually need it!
I suspected the voltage regulator particularly after feeling how hot it got. (Not too hot to touch but unexpectedly warm to hot) . I made sure it was OFF yesterday so when I tried it just now, the system would have fully rested and cooled.
Maybe the heat is affecting the video signal which passes through the same moulded casing. But why would that affect unused AV2?
Perhaps being accidentally ON for an extended period something in the display heated up and/or consequentially malfunctioned.
KiwiKruiser- Member
-
Posts : 10
Joined : 2022-01-11
Location : Auckland
Auto-Sleeper : Sigma EL
Vehicle Year : 2008
Re: VEBA AV70mm reversing camera
![]() by KiwiKruiser Thu Jan 13, 2022 3:07 am
by KiwiKruiser Thu Jan 13, 2022 3:07 am
If true, I would think both AV1 and AV2 would need be isolated from power supply by the ignition switch?!? Mine isnt.
New investigation underway.
KiwiKruiser- Member
-
Posts : 10
Joined : 2022-01-11
Location : Auckland
Auto-Sleeper : Sigma EL
Vehicle Year : 2008
Position
![]() by MCRJ Thu Jan 13, 2022 2:51 pm
by MCRJ Thu Jan 13, 2022 2:51 pm
How did you determine the position of the hole?gassygassy wrote:THIS ASSUMES YOU HAVE A REAR KITCHEN LAYOUT AND YOU WANT TO FIT DUAL REVERSING CAMERAS:
I found the single camera fitted to the Nuevo wasn't much good, certainly not in quality nor in quantity. You need two cameras, one to see the following traffic and another pointing down at the bollard you are about to collide with. I wrote an article on how to do this and it was published in MMM. In fact I thought I had written it up on this forum somewhere.
You need the whole kit, I got mine from [You must be registered and logged in to see this link.] I have had about half a dozen kits from them. Dave there is extremely knowledgeable and helpful. There are a few tricky moments for which you have to summon all your confidence. One is to drill a big hole immediately in front of the standard fitted camera in order to undo the nut that holds it in, and the other is to feed a new cable from there across the top of the kitchen cabinets in the void between the outer fibreglass skin and the inner rear cabinetry. You need a new cable (DRW supplies this in the right length for your van) because you can't get two camera signals down the one-signal cable that is fitted as standard. Then you have to get the cable down to chassis level and from there it is easy peasy. I wouldn't run the cable above the side entrance door and through the cupboards, that route poses a lot of difficulties. Here are some photos which might help:
The first is the dimensions of where to drill the hole to access the rear of the original camera. You will need a hole at least 2 1/2 inches dia in order to get most of your hand into, and in order to undo the nut and feed a cable across inside the void. Then you need some stiff-but-not-rigid wire as a draw string to attach the new cable to. I found the best solution to hand was to use satellite TV aerial cable, it is just rigid enough to be able to push through a void and yet bendable enough to make a hook to attach the new camera cable to.
The process is this:
Measure where to drill the hole and cut a 2 1/2" - 3" hole in the top cupboard.
Cut the original cable where it enters the nut, and undo the nut. Remove the old camera.
Take the satellite cable and form a U bend in it. This will be needed to hook the electrical rod on to, to pull it down through the vertical void. Feed it through the hole horizontally across through the void towards the nearside, above the top of the Nuevo indented fibreglass back.
From underneath post an electrical rod set (cheap, eg from screwfix / plumbfix) and hook the satellite cable round the rod hook, and pull it down to below the floor level. There is another void running vertically from roof to floor at the corner. Removing the rear lights will probably help.
You now have the 'stiff-but-flexible' satellite cable running from the rear of the camera to under the floor, and that is the difficult bit over. Join the new dual camera cable to the satellite cable and pull it through.
Run the camera cable along under the chassis to the n/s door footwell, remove the plastic foot-tread and drill / grommet a hole for the new cable to pass through.
Run the cable up the door frame, undo the side windscreen plastic trim, put the cable inside it, and feed it under the front of the cab roof lining to the mirror position. Coil up the surplus cable and tuck it inside the roof lining.
Find 12v-when-the-ignition-is-on from the general wiring you will find above the interior light and feed this to the new rear view monitor.
Back at the camera end drill a slightly bigger hole than the existing one for the camera cable, mount the dual cameras and the rest is easy so I don't need to elaborate.
To fill the big hole in front of the camera inside the roof cupboard I took the circular disk I cut out, and pushed it back holding it in place with silicone. I then got a 4 inch square ceramic tile which matched the wallpaper inside the cupboard and stuck it on to hide the circular access point. Once you have crockery etc in the cupboard you will never notice it.
I have a lot more photos but this web site will only allow me to post three so I hope I have chosen the most useful ones.
[You must be registered and logged in to see this link.]

MCRJ- Member
-
Posts : 11
Joined : 2012-09-05
Member Age : 73
Location : STOCKPORT
Auto-Sleeper : Nuevo
Re: VEBA AV70mm reversing camera
![]() by KiwiKruiser Fri Jan 14, 2022 5:34 am
by KiwiKruiser Fri Jan 14, 2022 5:34 am
Re Reversing Camera
I have located and gained access to what I believe to be the main electrical junction with surprising good access. There are 4 wires coming from the roof (“TOP” on my diagram) and 4 leaving just above the front door (“Bottom”). The 4 are labelled AV, 12v/24v, GND, Reversing Wire. I did not test/trace the AV Cable other than to view it at the camera, Monitor and at this junction as being of similar external appearance.
I tested the other 3 wires using a Fluke 7-600 tester. I know enough to be dangerous but not enough to be really useful about this process. I tested across each of the 3 spade connectors and a solid seat bolt as earth (3 tests). I then separated each Spade and tested across the terminal and earth (6 tests). For the “Reversing Wire” I tested with the gear lever in neutral then again in reverse gear. Picture of the results attached.
I also tested the vehicle battery across the terminals 12.17v. Then the house battery at 13.7v. Why? Because I could. But it showed 3 interesting things:
[list=ol1]
[*]my vehicle battery was down to 12.17v (because I had left the ignition and headlights on all morning while I tested etc so thats now on charge). I already knew that to use the camera I needed the ignition and reverse gear “ON” but didnt need the engine running.
[*]the reversing camera seems to be powered by the house system! House is on solar and always charged hence the 13.7v. Is that the normal source for a camera?
[*]The power is “always on” as I suspected hence the regulator being hot at the beginning of all this.
[/list]
Murphy stayed away - the camera and monitor behaved well all through this. I don’t understand why the voltage is down on the Reversing Wire. Maybe it is powered by the vehicle battery? My understanding or lack thereof with 2 batteries participating is zero.
Since it is currently working OK, I think I will now put it all back together again but install an accessible switch on the main 12v line so I can prevent this being “always on”. It means I will have to turn this switch on each time I want to use the reversing camera.
Any help or questions welcome.
[You must be registered and logged in to see this image.]
[You must be registered and logged in to see this image.]
Brian
Last edited by KiwiKruiser on Fri Jan 14, 2022 9:57 am; edited 3 times in total (Reason for editing : Trying to add photos using an iPad)
KiwiKruiser- Member
-
Posts : 10
Joined : 2022-01-11
Location : Auckland
Auto-Sleeper : Sigma EL
Vehicle Year : 2008
Re: VEBA AV70mm reversing camera
![]() by KiwiKruiser Fri Jan 14, 2022 6:42 am
by KiwiKruiser Fri Jan 14, 2022 6:42 am
Last edited by KiwiKruiser on Fri Jan 14, 2022 7:03 am; edited 1 time in total (Reason for editing : Trying to delete this)
KiwiKruiser- Member
-
Posts : 10
Joined : 2022-01-11
Location : Auckland
Auto-Sleeper : Sigma EL
Vehicle Year : 2008
Re: VEBA AV70mm reversing camera
![]() by gassygassy Fri Jan 14, 2022 9:14 am
by gassygassy Fri Jan 14, 2022 9:14 am
It was with a bit of trepidation, I did measure lots of times, not just twice. Then you need to use a wood hole saw which is sufficiently large diameter to get most if not all of your hand into because the nut holding the camera in place is several inches to the rear of the cupboard wall. You will need to undo the nut that is holding the camera in place. Also you have to be careful cutting the hole because there are wires behind there and you don't want to cut into them. Therefore you need to cut slowly and as soon as you feel the 'give' in the hole cutter getting through, stop and pull it out. Bear in mind that if you cut the hole too small you will have considerable difficulty making it bigger. You cannot for example cut a 3" hole, find it is too small and then try to make it 4". When you have cut the hole you will get a circle of plywood and polystyrene foam the thickness of the wall and you can replace it by wrapping some tape around it to make up the gap. In my case I did this and replaced the circle and got a beige ceramic tile and stuck it over the evidence. When the area is covered by the contents of the cupboard the job is not noticeable.
This was not the trickiest part of the job. The trickiest part was how to get the new camera cable across the top of the rear wall inside the void between the cupboards and the rear fibreglass wall, and then down to the light cluster. Once the rear lights are removed and you have found the camera wire, the rest is easy peasy. You need some 'stiff but bendy' wire to feed through the horizontal void to start with before attaching the camera wire to it. I found a spare bit of satellite TV aerial cable to be ideal for this, then you need a hook to fish up from below to grab the satellite cable and pull it down. It is achievable and is pot luck whether you get the hook on sooner or later after many tries and cups of tea. You would need "fishing rods' as used by electricians, and if you find you really can't do it, you should be able to get a professional electrician to fish the cable through.
The thing is that so long as you "Do no Harm" as in the Hippocratic Oath, if it all goes pear shaped and you give up, you can run the cable inside the cupboards or get the professional electrician who will have experience of fishing cables in voids in houses.
_________________
complexity is the enemy of reliability
gassygassy- Donator
-
Posts : 1111
Joined : 2019-06-21
Location : Lutterworth
Auto-Sleeper : 1 Bourton 1 Polensa
Vehicle Year : various
Re: VEBA AV70mm reversing camera
![]() by KiwiKruiser Fri Jan 14, 2022 8:32 pm
by KiwiKruiser Fri Jan 14, 2022 8:32 pm
[You must be registered and logged in to see this link.]
KiwiKruiser- Member
-
Posts : 10
Joined : 2022-01-11
Location : Auckland
Auto-Sleeper : Sigma EL
Vehicle Year : 2008
Page 1 of 2 • 1, 2 ![]()
» Reversing camera and rear view camera
» Reversing camera
» VEBA Reversing Camera
» Reversing Camera
The Auto-Sleeper Motorhome Owners Forum (ASOF) :: Auto-Sleeper Motorhome Forums :: Auto-Sleeper "Coachbuilt Motorhomes" Forum